Tag Archives: Craft

Alice in Wonderland

Standard
Alice in Wonderland

P1000377

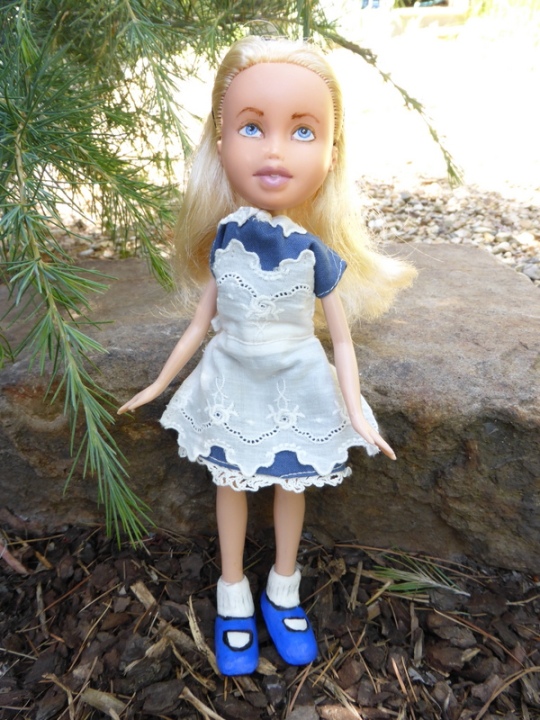
I have been wanting to create ‘Alice’ for a while now.  I felt this doll (once made-under and repainted) had just the right look.  Then I had to figure out how to make the dress and shoes.

I’m no seamstress so it was more a case of ‘work it out as I go’.  I had some old lace that had been hanging around for a while that I thought would go just right for Alice’s apron.

The shoes are always my biggest nightmare but having cut down an old pair of Bratz high heels I then sculpted with paper clay and Modpodge to create these little Mary-janes which don’t look too bad (hopefully with practice they will get better).

She is now in my Etsy store and hopefully an Alice in Wonderland fan out there will want her for sitting on a shelf (or for playing with)!


Gum Leaf Dolls and the Tree Change Zeitgeist

Standard

2015-07-02 15.45.46

Say ‘hi’ to my Gum Leaf Dolls – the obsession which has kept me busy into the wee small hours since losing my day job a few weeks ago.

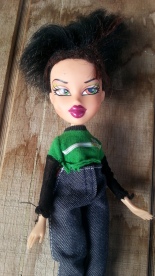
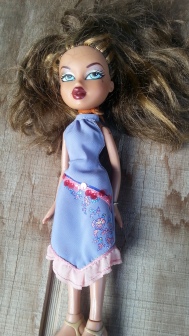
For anyone who hasn’t heard (and I believe there may still be a few out there) a new phenomenon hit the airwaves earlier this year … Tree Change Dolls by Sonia Singh an artist and mother of little girls living in Tasmania. She started removing the face paint from discarded Bratz dolls – a bit like this one:
2015-06-15 13.02.25

As well as removing the face paint, she would also work on restoring and untangling the hair (which believe me is no mean feat, it takes me over an hour usually to get all the knots and tangles out).

This is how they look at this stage:

2015-06-14 17.29.50

Now it’s a blank canvas and for me the fun part of painting on new features and seeing a new personality emerge. I like seeing the transformation into a more natural child-like look of dolls who enjoy playing in the outside world, climbing trees and camping.  A world that seems to becoming less and less accessible to children today and like Sonia I feel it is about creating the kind of doll I would have loved playing with myself as a child.

2015-07-02 15.35.38

This is the ‘after’ photo of the Bratz doll above

Sonia has been generous with her knowledge and has a number of Youtube videos that help others do what she does and a quick look on Etsy will show how many are having a go themselves. I think as so many are wanting Sonia’s dolls and they sell out within seconds, there is no problem in others jumping on the proverbial band-wagon as each artist has their own unique style.

So far, so good but what a shock I got when I started reading some of the reactions on Tumblr as well as other internet haunts to the Tree Change explosion. It never occurred to me that some could get so incensed and inflamed about, what to me, was a fairly innocent and harmless hobby. There are those however, who are vehemently opposed and see them as an abomination and the ruining of a perfectly good doll.  Not only that but they seem to see it as some kind of political statement.  I can only say that from my own point of view, it is not about making a political point but just taking a toy that has been discarded, cleaning it up and giving it a new look and a new lease of life.  If you like your Bratz dolls to look as they did when they left the factory, absolutely fine – keep them that way.  If you prefer the Tree Change look, surely that’s fine too – each to their own, live and let live etc. etc. and really I think there are far more pressing issues in the world to get worked up about. Let me know where you stand on the issue and in the meantime here are a few more before and after pics.

2015-06-15 13.02.072015-07-02 15.37.50

2015-06-20 14.50.592015-07-02 14.21.09

Scrappy Drawstring Bags (great for presents)!

Standard
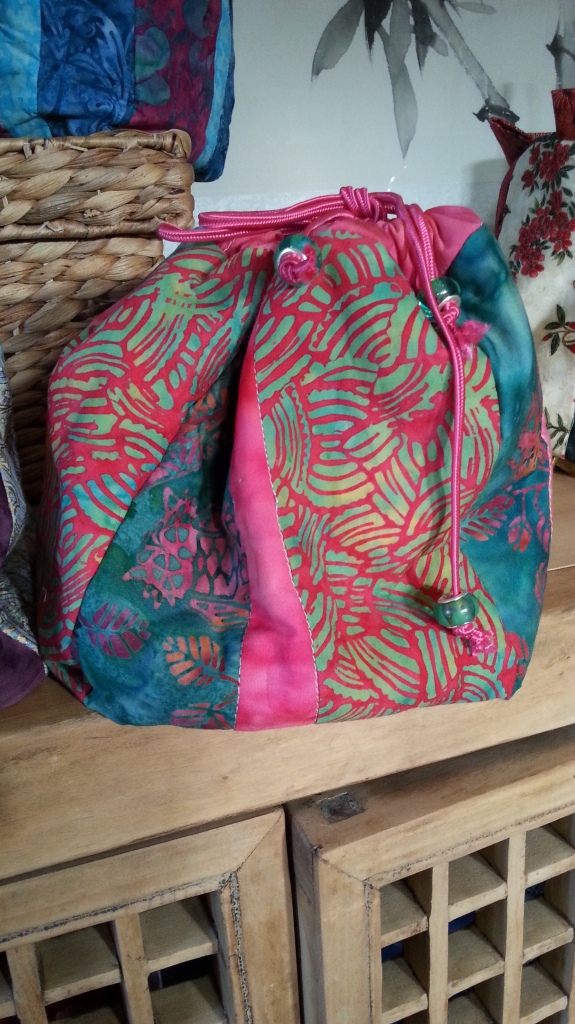
Batik fabric drawstring bag

Batik fabric drawstring bag

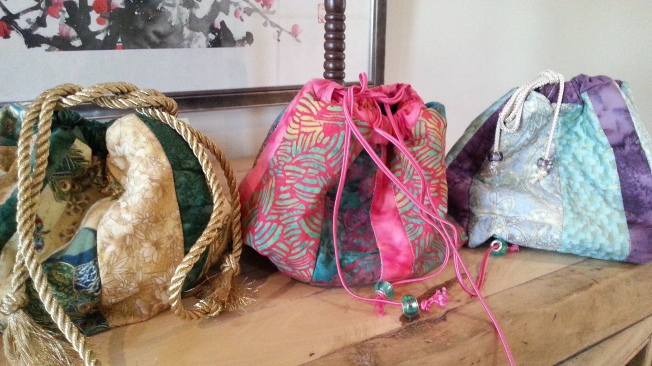
Seeing as I had some rather lovely batik fabric left over – I decided to make some drawstring bags. Having made one, and enjoyed it so much, it seemed only natural that I should make a few more! There is something really satisfying about these little bags. For one, they are very easy (and I’m not just saying that)… and for another thing, they make fantastic presents to give to friends and family. I think it is fair to say that once you have made one, subsequent bags can be made within a couple of hours. P.S – its also a great way of using up small pieces of batting. 2014-09-06 11.30.34 2014-09-05 15.50.27

Naruto update

Standard
Progress!

Progress!

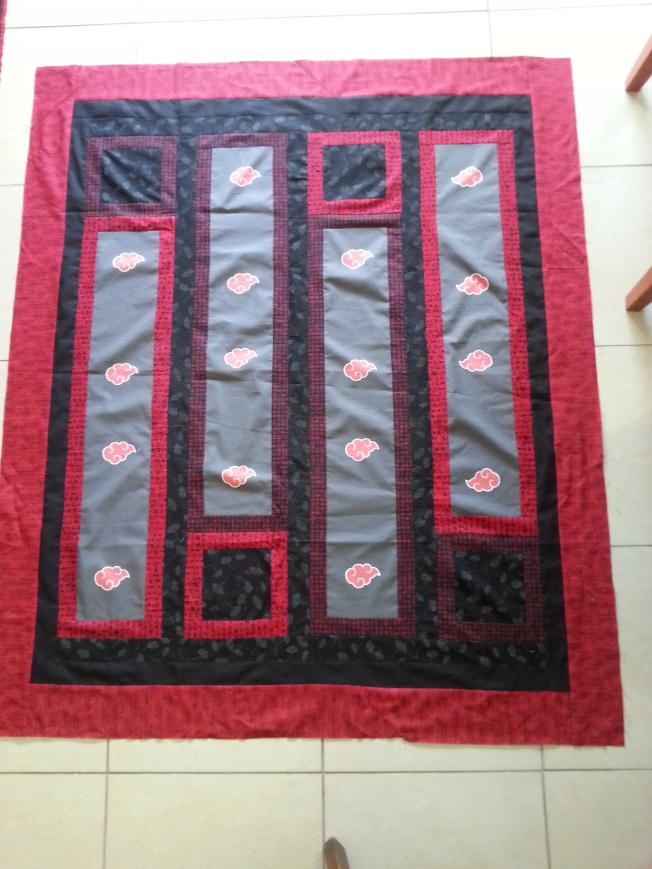
Its moving rather slowly (a bit too slow for my son’s liking) but I thought I would share where I am up to on the Naruto quilt. As I have been making it up as I go along, I haven’t quite decided how much bigger to make it but I think it will need another couple of borders so I will try and get enthused again so hopefully ready in time for his birthday in March (hmmm i guess that’s not too far away is it?)

Super Sweet Blogging Award

Standard

super-sweet-bloggingI have been awfully slack of late but just wanted to say a big thankyou to Rainbow Junkie for nominating me for the Super Sweet Blogging Award which was a Super Sweet thing to do! For those of you who don’t know Ms Rainbow has a lovely colourful blog on crochet as well as many other colourful things – go have a look at what she’s been up to!

THE RULES:

Copy & Paste This Whole Post and Replace All Your Information — who awarded you, for example.

(I am presuming that the important bit to copy is this below.)

Thank the Super Sweet Blogger that nominated you. (Done)
Answer 5 Super Sweet questions. (See below)
Include the Super Sweet Blogging Award in your blog post. (Done)
Nominate a baker’s dozen (13) other deserving bloggers. (See below)
Notify your Super Sweet nominees on their blog. (I will!)

THE 5 SUPER SWEET QUESTIONS:

1 – Cookies or Cake? Cake!

2 – Chocolate or Vanilla? Vanilla!

3 – Favorite Sweet Treat? Milk chocolate

4 – When Do You Crave Sweet Things The Most? Any time after lunch!

5 – Sweet Nick Name? Never really had one although I do get called “Crafty” from time to time these days lol!

And here’s my Baker’s Dozen:

My Home Makes
Projects by Mtetar
SusieDDesigns
Gippsland Granny
Creative Pixie
California Pixie (A special thanks to California Pixie for being the inspiration for Terrarium experiment)! You can see her fabulous creation here
Deep in the Heart of Textiles
Occasional Crafter
Schmoozelfleugen
Ruthie Quilts and Quilts!
Kirsten Jane
Pretty Lady Baby
Nice Piece of Work

And just to be really “sweet” I wanted to share with you the gorgeous crocheted slippers I ordered from the Super sweet Jill Goldberg (Nice Piece of Work) above!

Crochet slippers from Etsy store - Jam Tarts

Crochet slippers from Etsy store – Jam Tarts

Terrarium time!

Standard

I don’t know why exactly but I had a strong urge to make a terrarium today! I’m not particularly known for my horticultural skills but having seen some rather lovely examples on Pinterest, I decided it was time to give it a bit of a go. I went to the local Dollar King and bought myself a small fish bowl, a little bag of stones and I was all set.

And here is the result:

20130929_174554

The plants were all bits and pieces I got from our own garden and I’m hoping the sedum will grow and spread out a little but all in all I was pretty happy with it. I think actually I want to make some more!
20130929_174606

On another flowery topic, I was given the task of pricing up some items for the upcoming market at the Pioneer Church. I was given two enormous soup mugs and rather than just stick a price on them and hope that they sell I decided to play with some artificial flowers that had been sitting there doing nothing to see if we could jazz them up a bit. Here they are post jazzing!
20130929_17491520130929_17485620130929_174728


So there we have it, I have been absent for so long (and have missed my little blog and bloggy friends) but as Spring is definitely under way in this part of the world, I thought it might not be a bad idea to do something sufficiently Springy!

Christmas Stocking Project

Standard

Christmas stocking after first session

Christmas stocking after first session


I know this probably feels all wrong to most of you but here in wintry Melbourne (I actually had to scrape ice of the windscreen the other morning)! It feels like just the right time of year for me to be making a Christmas project and this one is so much fun. It is a Christmas stocking called My Favorite Things and it is by Kerry Gillespie. You can order it here if you would like one too.

I got together with my Mad Cow buddies on Saturday in one of the girls’ houses and she had set it up so beautifully with two tables for us to work on and a tea and coffee-making table (I told her it looked just like a conference centre)!

Initially when we got the pattern, we were all a little daunted (well I was anyway) as it required cutting out the fabric, tracing the design on and then painting before any stitching could take place. With all of us together though, it no longer seemed as daunting and with a great flurry of activity it wasn’t long before we were painting on our fabric stockings – it was amazing how quiet we all were (obviously all too busy concentrating to talk).

Lunchtime came and we were treated to the amazing cooking abilities of our host’s hubbie with homemade gyoza (Japanese dumplings) Chinese style duck pancakes and mini chicken and leek pies – of course we all ate too much as it was far too hard to resist and it would have been rude not to!

By 4pm when it was time to pack away our paints we were all amazed at how much we had managed to accomplish and were keen to make a date for a follow-up session. So I will keep you updated on how our stockings progress and hopefully it will be done before Santa comes hurtling down our chimneys!

Close-up

Close-up


2013-06-24 16.07.46
I include this last photo because it was the bit that went most wrong! I am hoping to somehow rescue it as we go along. This is what comes of being impatient and trying to add paint to sections that haven’t dried properly! What do they say about learning from mistakes?!
2013-06-24 16.08.03

Jelly roll tube tutorial

Standard

I came across a great tutorial the other day on youtube by Misouri Quilters and thought I would give it a whirl as I have had a Kaffe Fassett jelly roll sitting there looking at me for far too long! The thing I like about this method is that you only have to sew two long seams and then because of the way you cut it, you have a variety of different effects you can create.

First of all you take two strips from your jelly roll and then sew them together, length ways (right sides facing).

two jelly roll strips

two jelly roll strips


Sew them together

Sew them together


Make sure you iron the seam flat (towards the darker fabric).

Now you need another piece of fabric that is the same width of the two jelly roll pieces sewn together ie. 4.5″ x width of bolt. I had some batik fabrics left over from another project and so decided to try that out.

4.5" x width of bolt strip

4.5″ x width of bolt strip


Now for the tube part:

Lay your 4.5″ strip of fabric on top of the other two strips (right sides facing)

Lay them on top of each other

Lay them on top of each other


Then sew a quarter inch seam down both lengths of the fabric – thus creating your tube!

Quarter inch seam down both sides

Quarter inch seam down both sides

Now you need a large square ruler (I used a 12.5″) with a 45 deg angle marked on it and you need to place the line of the 45 deg angle on top of your seam line as in the picture below:

45 deg line is on top of seam line

45 deg line is on top of seam line

Make your cut
2013-04-22 18.21.38

Keeping the edge of your ruler against the edge of the fabric you just slide it down so that the 45 deg angle line is sitting on top of the other seam line:
2013-04-22 18.22.55

Make your cut and then slide back to the other seam line:
2013-04-22 18.24.13

Keep going in this way until you get to the other end.

Now for the fun part. Open up and iron your resulting squares flat and then ….. time to play!
2013-04-22 18.44.30

2013-04-22 18.48.03

A friendly kind of bomb

Standard

Yarn bombing of course or yarn storming as it is also known. I took a little drive down Hampton Street today in search of the wonderful yarn bombing that was there just a few weeks ago. Alas there wasn’t much left but there were a couple of colourfully dressed trees left. I did notice a few other ways the streetscape has had a bit of artistic cheering up!

Yarn -bombed tree in Hampton Street

Yarn -bombed tree in Hampton Street

Yarn bombed tree - Hampton Street

Yarn bombed tree – Hampton Street

I really appreciate this kind of ‘graffiti’ as I think it brings a touch of colour, whimsy and humour to an otherwise dull street-scape. I’m always a bit taken aback when I read negative comments in the local newspaper complaining that it is untidy, messy and unhygenic! Oh please, surely anything harmless that brings a bit of a smile to people’s faces can’t be that bad can it?

For those of you who appreciate a little yarn bombing, take a look at Stitched up Mama for a taste of subversive knitting and crochet!
and here at Yarn Corner which is a Melbourne based group.

I thought you might also appreciate this shop I noticed – haven’t seen anything like this before:

Shop decorated with lace doilies

Shop decorated with lace doilies


Close up of doilees

Close up of
doilees

And a little bit of mosaic never goes amiss:

2012-12-29 15.57.31

2012-12-29 15.57.52

I would love to hear your thoughts on street art ie. what is acceptable and where (if anywhere) should we draw the line.

versitle-blogger

I have the lovely Winter Owls to thank for nominating me for the Versatile Blogger Award and very honoured I am to accept it (even though its taken me a while to get round to it)! I love her blog and her original style – go have a look, if you haven’t already, there are great craft ideas, lovely photos, artwork and Ruby the pugalier!

Now for my 15 nominations for the Award – I understand if you feel unable to accept the award if you are too busy or for whatever reason. Please just take it as acknowledgement that your blog has given me much pleasure over the last few months!:

The Nerdy Sewist
Living Simply Free
Life on a Dirt Road
Beyond Back Creek
The Inbox Jaunt
Crazy Wonderful Life
Pauline Knits
A Daisy Garden
Creative Pixie
Cute as a Button 82
Gone Rustic
Blogging in the Slow Lane
Daniella Joes Blog
The Green Dragonfly
Stitched Up Mama

Now for 7 facts you may not know about me:

1. At age 12 I was a huge Donny Osmond fan
2. I’m not keen on olives or anchovies (but love olive oil)
3. I always loved SF particularly Doctor Who and Star Trek (what a geek)
4. I love HBO program’s like Sopranos, Mad Men and Breaking Bad
5. I always eat the orange creams first, never the caramels (they pull my fillings out).
6. The first single I ever bought was A Walking Miracle (bet no one remembers that!)
7. I dream of renting a cottage in Tuscany or South of France for a couple of months and walking to the local market every day for bread and cheese.

Well this has been a bit of an epic post, hope I didn’t lose everyone on the way!

I will also take the opportunity to wish all of you a happy New Year and an extra yummy, creative 2013!
Having fun with my Baby!

Standard
Baby Go!

Baby Go!

Don’t you just love getting a new toy to play with? I do and its not even Christmas yet! Anyway here it is – the Go Baby fabric cutter by Accuquilt.

There is a bigger version too but this one is just fine for my needs. I wanted to test out how quickly I could put a small quilt top together so this is what happened:

Cutting out the pieces

Cutting out the pieces

I have used a small tumbler die for this quilt (3.5″) and being me, I started cutting at 10pm and cut out 154 tumbler shapes – this took me exactly 1 hour.

2012-12-09 15.53.24

Then I laid them all out on the floor to get the colour combination right and stacked them all in their rows – ready for sewing.
2012-12-09 15.53.46

2012-12-09 15.54.26

After sewing all the tumblers together into their rows – I ironed the seams (alternating them to the left on one row and then to the right on the next etc.)
2012-12-10 21.20.11

Then I sewed the rows together (this is where those little labels come in handy).

A bit more ironing and then I put a 3.5″ border on and ……..

One finished quilt top!

One finished quilt top!

This really was a whizz to put together – even though I was doing an hour here and there – It still only took me a couple of days so really good if you had a cot quilt or lap quilt you wanted to put together quickly for a present.

I didn’t have any real plans for this quilt and then its purpose became clear but I’ll tell you about that later.