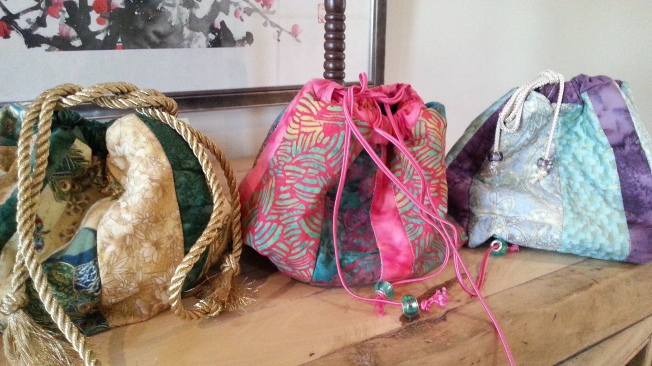
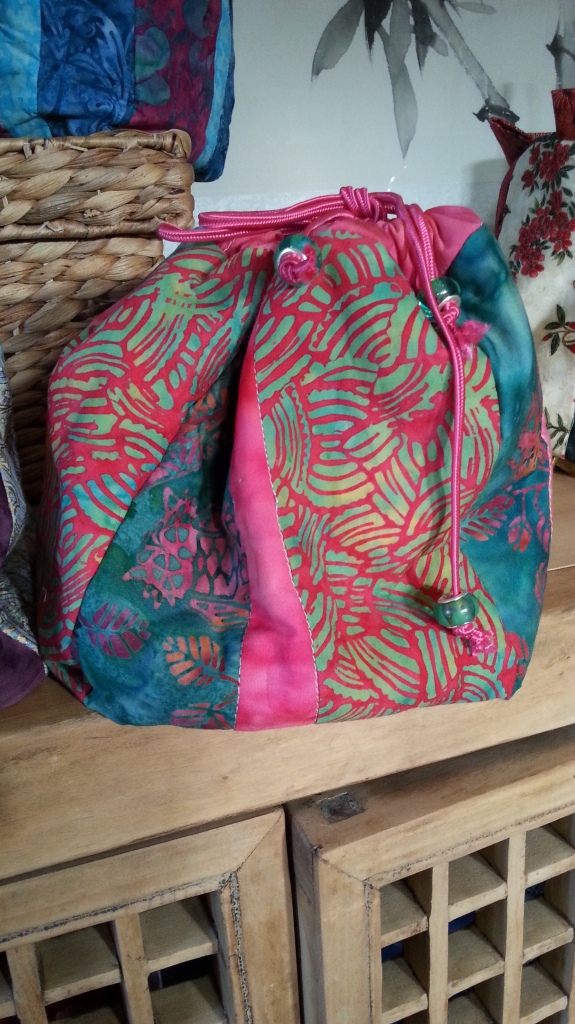
Seeing as I had some rather lovely batik fabric left over – I decided to make some drawstring bags. Having made one, and enjoyed it so much, it seemed only natural that I should make a few more! There is something really satisfying about these little bags. For one, they are very easy (and I’m not just saying that)… and for another thing, they make fantastic presents to give to friends and family. I think it is fair to say that once you have made one, subsequent bags can be made within a couple of hours. P.S – its also a great way of using up small pieces of batting. 

Tag Archives: sewing
Jelly roll tube tutorial
I came across a great tutorial the other day on youtube by Misouri Quilters and thought I would give it a whirl as I have had a Kaffe Fassett jelly roll sitting there looking at me for far too long! The thing I like about this method is that you only have to sew two long seams and then because of the way you cut it, you have a variety of different effects you can create.
First of all you take two strips from your jelly roll and then sew them together, length ways (right sides facing).
Make sure you iron the seam flat (towards the darker fabric).
Now you need another piece of fabric that is the same width of the two jelly roll pieces sewn together ie. 4.5″ x width of bolt. I had some batik fabrics left over from another project and so decided to try that out.
Now for the tube part:
Lay your 4.5″ strip of fabric on top of the other two strips (right sides facing)
Then sew a quarter inch seam down both lengths of the fabric – thus creating your tube!
Now you need a large square ruler (I used a 12.5″) with a 45 deg angle marked on it and you need to place the line of the 45 deg angle on top of your seam line as in the picture below:
Keeping the edge of your ruler against the edge of the fabric you just slide it down so that the 45 deg angle line is sitting on top of the other seam line:

Make your cut and then slide back to the other seam line:

Keep going in this way until you get to the other end.
Now for the fun part. Open up and iron your resulting squares flat and then ….. time to play!

Cats and Aprons
At last the temperatures have come down to something a lot more comfortable in Melbourne but I have to admit that I had a serious case of brain-melt earlier in the week and found the idea of making anything quite a struggle.
However I did manage a couple of minor achievements so I thought I would share.
First of all I have had a bit of a hankering for making a quick and easy apron and when a friend told me that you could make an apron from ONE fat quarter I couldn’t wait to have a go and found this rather super tutorial here from Jaime at Prudent Baby. It was my kind of tutorial – clear, straight forward and easy to follow.
I have to admit I was very happy with the results and you really can make them in about half an hour! I was especially happy because the fat quarters I am using for the aprons were some very cheap ones I picked up at a craft show about 6 months ago (just because I didn’t want to come home empty handed)!
but they weren’t anything I would normally use in quilting. However they seemed to be just perfect for little pinnies and the blue one with its ‘Walzting Matilda’ motif and kangaroo would be ideal for a small overseas gift me thinks!Then I decided I would have another go at the cat pattern I made some time last year as I had some lovely retro fabric I fancied using and this was the result:
Then I couldn’t resist taking one with his friend:
Zippity doo dah (facing my fears)!
I wrote last week about my struggles to get back into the creative swing of things and received some lovely uplifting responses – thank you one and all!
I thought it would be a good idea to try something new and also something I have had a slightly irrational fear over….. yes, the dreaded zip! I don’t think I’m alone in this avoidance of all things zippy from what I was reading on the net and hearing from friends so I took courage in both hands and went in search of a nice easy tutorial.
I found what I was looking for here at the lovely Sew Delicious blog. Ros is the very talented author of the blog and her pictures and instructions were so clear, I didn’t even feel scared!!
If you haven’t been there already, I can seriously recommend her blog.
Well anyway this is what I came up with first of all:
I really like the fabric and kept wondering what I should do with it as it is quite a heavy duty cotton. I kept thinking bags of some sort but I didn’t have any large pieces so anyway I got quite into the swing of things and made a few more.
I thought this would make a nice girly penci case and although my German is somewhat rusty I believe it says: “The World’s lovliest countries”
yes I know I shouldn’t say ‘boy’ and ‘girl’ fabric but I do think one is more masculine than the other.
As you can see, once I started I just wanted to keep going. Now I have to go and buy some more zips!
Feeling owlie
It all started with this little guy after I ordered some fabric from the US:
He is soon to fly off to his new home – not too far away, so I’ll be able to visit.
I had a few other retro-type fabrics so I decided to make a few more owl friends and here they are:
and last but not least….

I have a feeling it may not be the end of it….


